
Most of our television watching in the kitchen is done while setting at the table. That table is along the wall to the right of the baker's rack. If the point of the corner is 12 o'clock, one of us is sitting at 5 and the other at 2:30. So I actually wanted to skew the television a little to the right for better visibility. For that reason I used the third metal rod on the left and the second metal rod on the right as my attachment points. Those also happed to be 17 1/2 inches apart and would be hidden behind the television which is 18 inches wide.
I determined that I needed my 2 pieces of hanger metal cut to 25 inches to allow for the wrap-a-round and a margin of safety. I pre-cut those before I removed the Toshiba base and took my best shot at getting them flat and straight.
I carefully removed the existing base according to the directions included with the HD_TV. Just 5 little screws and it slipped right off. I saved the screws by returning them to the holes as it appeared that they also help hold a portion of the back-plate secure. Be sure to protect your screen by laying the TV face down on a blanket or towel while removing your base.
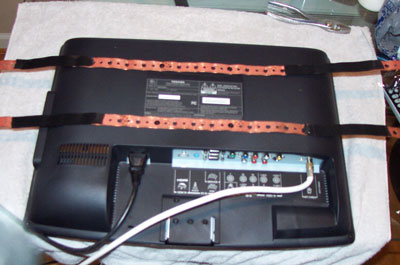
Hanger metal has small holes and larger holes. Unbelievably both lined up perfectly with the holes on the back of the television. But the screws would not fit through the smaller holes so I used the larger ones. I attached the two strips of hanger to the back of the television as shown in the picture below.

Experienced DIY people are asking about now, " Why did the idiot buy copper plated hanger metal"? I agree it is prettier but that isn't the reason. The real reason is that was all Lowes had in stock and I bought the last roll of that. Methinks they might be a little too aggressive on inventory management right now.
I then applied electrical tape (shown in the picture above) to the exposed portion of the metal so when it is wrapped around the metal rods on the baker's rack the finish would not be damaged.
An extra pair of hands would have been really helpful for actually setting the TV into place but I did it by myself using a towel to protect the rack and the TV.
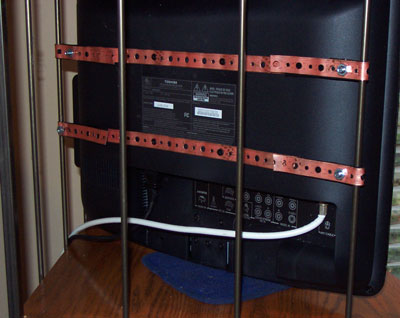
While holding the TV in place I pulled and folded the lower hanger straps into place. Then I secured the top ones using those 1/4-20 bolts as you can see in the picture below. At this point I left the bolts a little loose to allow the TV to slide up and down the poles because I still needed that wiggle room to add my rubber "feet". Once I had my "feet" installed I tightened the bolts to snug.


I also used the locking pliers to hold the stoppers while using the Dremel. Use a medium speed on the Dremel. To fast and the rubber will burn. To slow and it will bog down the Dremel.
Lowes hides the rubber stoppers in one of those little drawers on the hardware aisle and I imagine Home Depot has them in some equally obscure place.
Just one additional note to help you with your project, some of the perforated metal which is also sold on the hardware aisle might be a better choice for your project. If the holes are too large for the screw heads you can always use a fender washer. This metal could also support larger televisions.