Chi HouseHomeRepair | A Photo Illustrated Guide to Repairing Failed Plaster Part 2


Free Shipping on Orders Over $49! Buy Now and Save at 1-800LIGHTING.com!

A Photo Illustrated Guide to Repairing Failed Plaster Part 2

This is Part 2of a 2 part article.

This picture shows an incomplete scratch coat. I need to mix a second batch but I also wanted you to see the detail showing the DURABOND packed into the cracks.
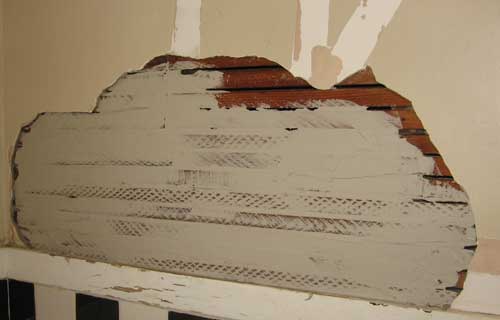
This picture shows the freshly applied scratch coat. Once this is set we can move on to the filler coats.
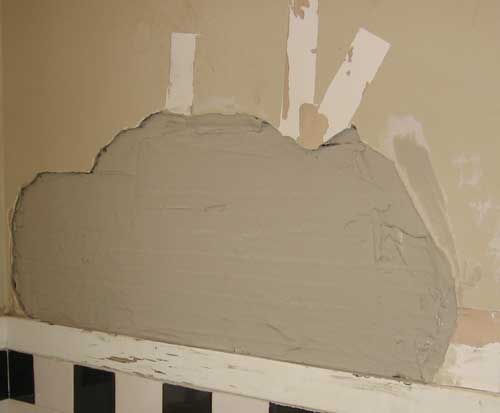
I am going to do this a little differently from what I normally do to illustrate a procedure that might make your first repair a lot easier to do. Normally I just slather on a few thin stripes the width of the drywall knife. This time I am going to screw some cheater boards to the wall to act as depth guides. The front side of the board is a little less than 1/8" below where the finished wall surface will be. When those are set I will remove the guide boards and fill the voids between the previously applied coats.
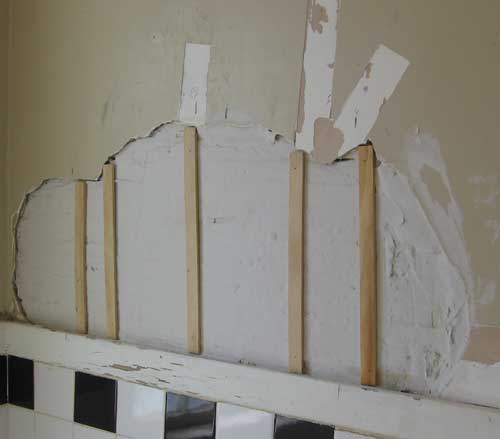
This picture shows the guide boards in place and the wider sections filled with fresh unset DURABOND. For a larger repair I would have used mortar mix for the scratch coat; but for this repair one bag of DURABOND did the entire job.
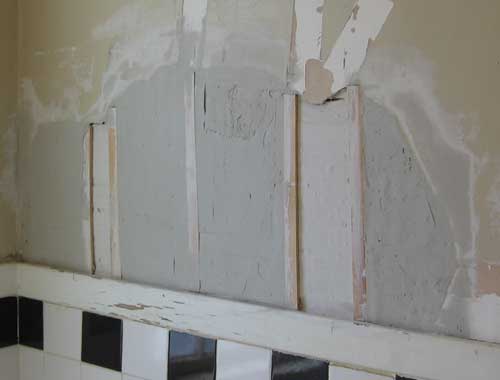
Then the boards are removed and the remaining area is filled with DURABOND. Then the application of the sandable top coat begins. I used a setting type 45 minute compound for that and applied it across the width of the existing DURABOND coat which is slightly lower than the final finished wall. This process is exactly the same as a deep skim coating. Coats are applied in ribbons and the voids are filled in until you have a smooth wall.

This picture shows an almost smooth wall where some light sanding and a few more coats of mud will make look like new.
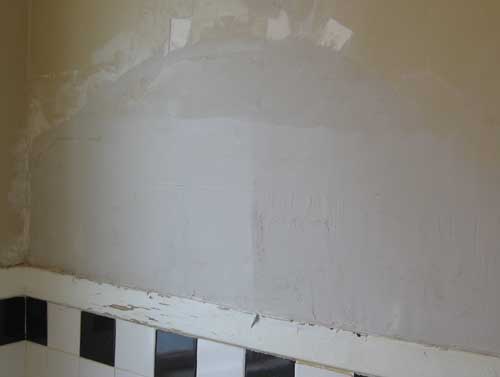
Unfortunately another project called and I never got around to taking a picture of the final finished wall. Probably just as well as I wound up tearing it all out and completely redoing that bathroom a few years later. But that is another article.


More Articles in:  Plaster

Click or touch anywhere on the text to view article.

Introduction to Plaster Wall Construction
You may encounter plaster in any one of three different configurations here in the United States; the oldest type of construction is a plaster coat ov................


Repairing Plaster Cracks
People often ask what type of plaster or other materials they need to repair minor cracks in plaster. They are often amazed when I reply drywall tape ................


Repairing Peeling Plaster Top Coat
One of the plaster failures that sometimes occurs is where the hard coat, also know as the top coat, the white layer pops loose from the otherwise sou................


Repairing Plaster Substrate
When the plaster substrate fails the plaster may fall off the wall or ceiling leaving exposed wood lath. You have several choices in how to repair thi................


Replacing Plaster with Drywall
If you have a large area that has failed it is often easier and faster to replace the failed portion with drywall. A 3/8" section of drywall applied ................


Repairing Plaster Nicks Dings and Pops
I cringe every time I read an article or see someone grab a tub of Spackle to fill these areas. Spackle is a wonderful product for very small holes l................


Hanging pictures and stuff on plaster walls
The biggest fear people seem to have about hanging stuff on plaster walls is that it will fracture or pop the plaster when they pound the nail into th................


Adding can lights to a plaster and lath ceiling
Recessed light or can lights remain a popular option for new home and remodel construction. The logistics of adding them to a home with plaster and l................


Read how this works