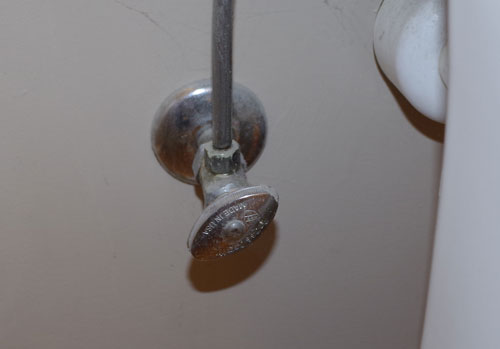

These little faucet-like devices under your sinks, toilets and behind your Fridge are called stops. Some call them cut off valves but stop is the correct term. They are made as straight stops, where the in and out water lines continue in a straight line or as angle stops, where the in and out water lines turn 90 degrees.

Everything fails eventually; but why builders insist on installing cheap stuff that fails the first time it is used after the warranty expires is beyond my ability to understand. The only rational reason is that they wanted to spend as little as possible to reach that expiration. A more honest view might be they took the low bidder who was the guilty party.
Stop valves also known as shut off valves when used as supply cutoffs to individual faucets or fixtures are made in two distinct flavors: the ones with a washer and cheap plastic stem using a style like a cheap faucet or 1/4 turn ball valves. That is like saying there are two cars, a Yugo and a Mercedes. The difference is about as radical.
The last time I checked there was about $1.50 difference between the crappy plastic stemmed one and a good 1/4 turn ball valve. Deciding which to purchase should not be a hard choice for you. It doesn't matter which you have now, the connection method is the same between both styles.
Replacing a cut off valve (stop valve) can be an easy piece of cake job or sometime it can become the job from hell. For sure the little buggers are located in mostly hard to reach places.
The vast majority of stops are right angle stops; they come out the wall and the supply line runs up to the fixture. Where pipes come up from the floor one may find a straight stop.
You will find one of three styles attached to the pipes in your home:
Compression fitting
Threaded fitting
Sweat or glued fitting
Of the three the only one likely to give you major problems is the one where the valve has been soldered or glued onto the pipe (sweat fitting). In home with traditional copper piping you will find a soldered or compression fitting. You can identify which you have with a visual inspection. If there is a large nut behind the cutoff close to the wall you have a compression fitting and your project just got a lot easier. All you need to do is hold the valve while you loosen the nut. About 80% of the time the nut and ferrule (brass ring) inside the nut can be reused with the new fitting so the install process is a simple mechanical connection. The other 20% of the time the ferrule and nut leaks and must be removed by cutting the ferrule and sliding both of them off the pipe. Care must be taken to not damage the pipe during this process.
If the pipe appears to project into the back of the stop and there is no nut or visible threads present then you may very well have a soldered stop. This is the more difficult to replace as the old one must be removed by heating the valve until the solder melts or if you are lucky enough to enough pipe sticking out of the wall you may be able to cut it off with a pipe cutter or hack saw. Cutting is the preferred method because the next joint is most likely just a few inches away; keeping that joint cool while heating the stop enough to remove it is very tough to do.
If you have enough pipe to cut it off you probably have enough pipe to use a compression stop for the new one. This reduces the risk of loosening a solder joint inside the wall while trying to sweat on a new stop.
A threaded stop is usually only found in homes with galvanized plumbing. This is a standard mechanical connection and whether it is galvanized pipe or an adapter as described below the removal process is exactly the same. You hold the pipe firmly in place while you unscrew the stop from the pipe.
A little used variant is where an adapter was soldered onto the pipe and a threaded stop was used. This would be treated like a threaded stop and removed as described below.