
This is part 2 of 2 of Installing Drapes Wood Pole with Rings.

There are several different styles of wood brackets and different manufacturers design them to mount differently. The old style, simple counter sunk holes through the bracket and a plug for the hole has been in use since colonial times and is still in use by the manufacturers of the cheaper brackets. You will find this style sold at discount design outlets in retail locations locally, online and in catalogs. It works okay as long as you are mounting on wood or where there is wood behind the drywall. It can be hellish to use with toggle bolts. An older Kirsch bracket using the screw hole method is shown in the image to the left.
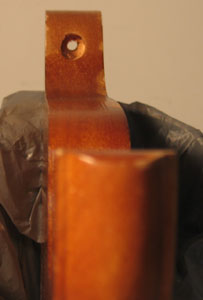
The second style is newer and is made in several flavors but the gist of all of them is that a metal part is securely attached to the mounting surface and the bracket attaches to that usually with screws or a threaded connection. A modern Kirsch bracket using the concealed metal hanger is shown in the image below. The pencil mark on the right reflects the bottom of the ring / top of the drapery and the the pencil mark on the left reflects the top mounting screw location.

You then need to determine the finished width of the rod and how much if any clearance off the floor is desired. Wise men will consult the wife on the subject of clearance and will obey without questions or comments. This is not a discussion you are going to win unless you are hanging these in the doghouse where you will be living if you don't just obey.
Just so you will be prepared for what she says, about 98% of the wood pole installations are installed just touching the floor or with a small 1/2- 1" break. The 2% that aren't are usually the fully operating panels or people with pets. In those cases 1/4 - 1/2" off the floor is the norm.
Put the finished length computations with where the top of the panel is going to be in relation to the bracket mounting method and you know the distance up the wall you need to measure.
Now we have to figure out where on the horizontal plane these go. For side panels only, usually an inch or two outside the casing. For fully operating panels you should review the article How to measure for pleated draperies. Of course your bracket must be installed within the width of the rod you have while allowing for one ring to the outside and any consumed by the finial.
Some fabrics stretch, some don't, the same is true for how they shrink in pressing, storage or transportation for all of those reasons and possible human error on the workroom's or your part, I always install the mounting plate with just one screw at the top, place the rod and rings in the brackets and hang one panel just to verify that everything is as it should be. Let in hang there for 5 minutes or so. Heavy rods or heavy drapes where that screw did not hit wood may require the temporary use a plastic anchor to insure it stays there for the full 5 minutes.
If all is good take the whole mess down and properly secure the brackets to the wall using toggles if you don't hit wood headers or studs. If it isn't make whatever adjustment you need to make. Most likely the extra screw hole will be hidden behind the bracket or panels.
Two toggles should never be installed within an inch and a half of each other because of the Swiss cheese effect. Use one toggle and a plastic anchor or maybe a molly. Always use the toggle in the top hole where the greater stress will be.
Pour yourself a cold one. You earned it.